
In order to get started with the Notices Acceptance component, Portal Administrators will need to create categories. These categories can be setup so only specific users can create notices under that category and specific groups of users can be sent the notices. For example, one can set up a category called Physicians. The Chief of Medicine can then be giving permissions to create notices for only their physicians can see the notice.
To setup a category click on the component menu ( ) and select Setup Categories.
To add a new category, click on the Add New Category button at the top of the grid.
If you need to edit an existing category, click on the pencil next to the name of the category you need to edit.
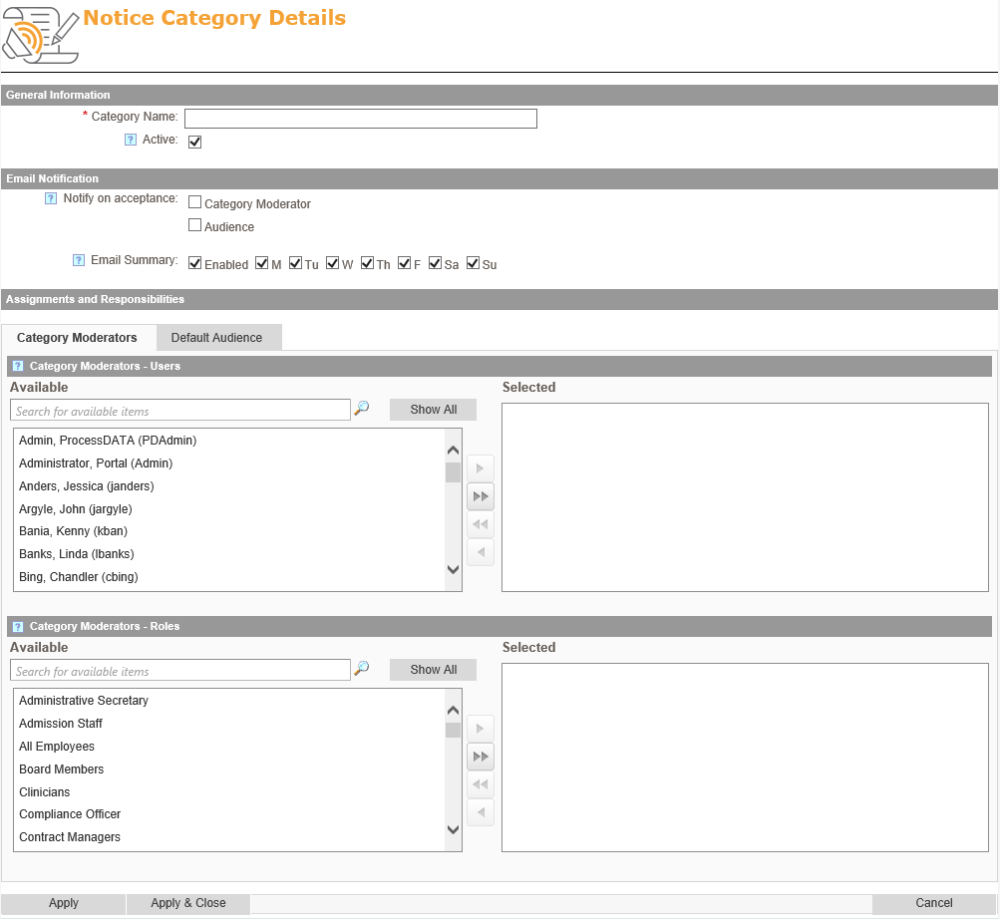
The first field you’ll see on the setup screen will be the Category Name. Beneath that, you’ll see an Active checkbox. Make sure that this is checked.
Under the Email Notifications section of the setup screen you have a few options:
- Notify on Acceptance – This will send an email notification whenever someone indicates that they have read the notice. In this section you can select the checkboxes for Category Moderator and or Audience.
- Email Summary – this is a summary email with all pending notices that will be sent to Category Moderators on the selected days.
Under the Assignments and Responsibilities section, select who you want to be the Category Moderators and the Audience. Each role can be populated with individual users or by Security Roles. Both roles have different functions as follows:
- Category Moderators – They have the ability to create and manage notices. They also have the ability to resend emails to people that have not read the notices
- Audience – These are the users that will be emailed and notified of the notices they need to read.
Post your comment on this topic.