
The Policies component allows for publishing online fillable forms created using the products built in Form Builder. When users click on the form in the tree, a popup will display with the form that they can fill out and submit to the defined recipients. You need to be a moderator or portal administrator in order to add a Form to a Policies component.
 To add a form to your Policies Component:
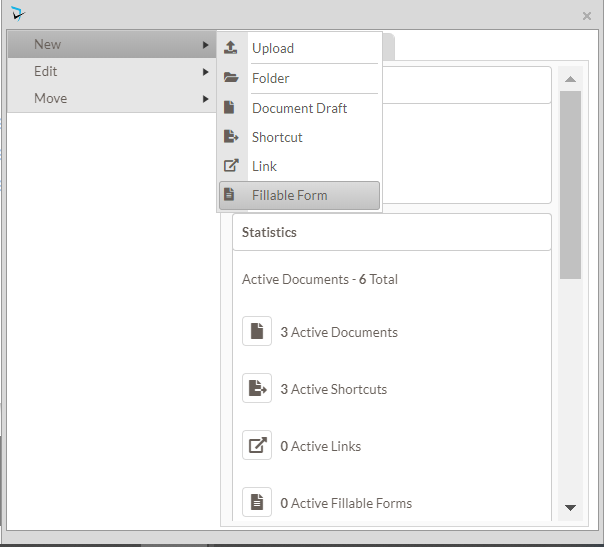
- Click on the folder menu that the form will be under and select New, then select Fillable Form.
- The Create a New Fillable Form popup will appear. In the Form Type dropdown, find the form template that you want to use. If you are a Portal Administrator or if the Portal Administrator gave you permissions to the Form Builder component, you may see a new icon (
![]() ) next to this dropdown. This will allow you to create a brand new template. Please see this article for learning to build a new form template
) next to this dropdown. This will allow you to create a brand new template. Please see this article for learning to build a new form template - You may optionally choose a Workflow to rout your form through a series of recipients by choosing an existing one from the dropdown. If you are a Portal Administrator or if the Portal Administrator gave you permissions to the Workflow Builder component, you may see a new icon (
![]() ) next to this dropdown. This will allow you to create a brand new workflow. Please see this article to learn how to build a workflow.
) next to this dropdown. This will allow you to create a brand new workflow. Please see this article to learn how to build a workflow. - Give the form a Title. This would be what will be displayed in the Policies tree.
- You may optionally provide a description.
 ) next to this dropdown. This will allow you to create a brand new template.
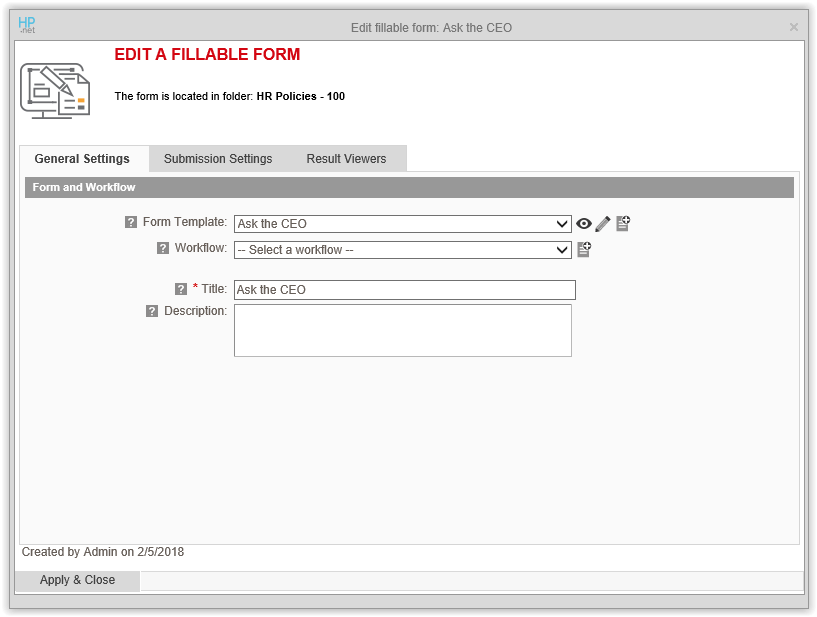
Submission Settings
Checking the E-Sign Form Upon Submission checkbox will automatically stamp the user’s name as a signature when the form is submitted.
In the Submission Confirmation section define what will show after a user clicks the “Submit* link on a form. There are several options for this:
- Display Text – This will direct the submitter to a page that display text that you can define in the HTML Editor as shown in the screenshot below.
- Redirect Page – Will take the submitter to another page on the intranet.
- Redirect URL – Will take the submitter to another website
- Show File – Provides a place where you may upload a document that will display upon submission of the form.
To notify recipients via tasks and/or emails out side of recipients specified in the Workflow, check the Define Recipients checkbox and then choose one of the options below:
- To notify recipients via tasks that will populate the Task Manager component, which also sends email
- To notify recipients via email only
- Select recipients of the form that is separate from any workflow that may be used
- Type in other email address that you want to receive a form.
Edit Online Fillable Form Settings
- Navigate to the document set that contains the online fillable form to be accessed
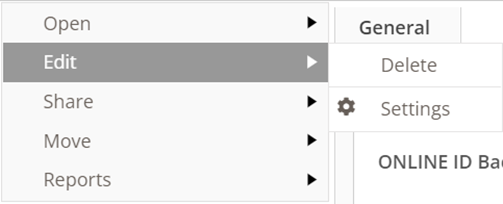
- Click the three-bar document menu for the online form to open the info card
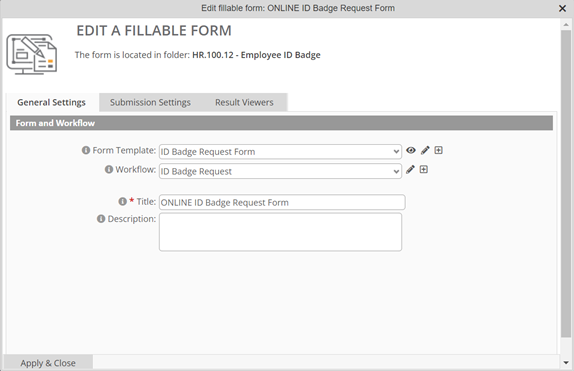
- To manage the form settings, users must have [Administrator – Applications] Administrator access
- Administrators can click the Edit option, then Settings
- The Edit Fillable Form screen is displayed, where Form Editors can change to the form settings, including the form fields and workflow, submission settings, and result viewers
View Online Fillable Form Submissions
- Users can view forms they have submitted, other submitted forms they have rights to view, or forms that require processing as part of the form workflow
- To access the results, users will click Reports on the Info Card menu, then View Results
- The accessible submissions will be displayed, and the filters can narrow the displayed results as needed
- Click the name of the submitted form to view the form itself
Post your comment on this topic.