
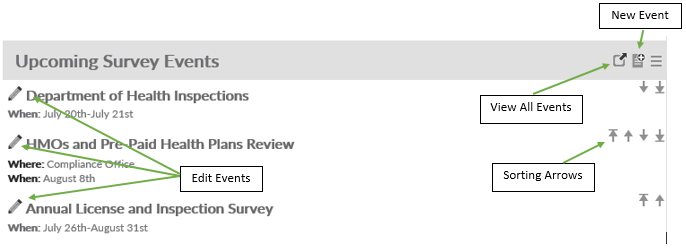
The events section of the updates page can be updated by members of the [Editors] – Updates security role. Members of this role will be able to post events like potential surveys, inspections, and more.
- To add a new Event, click the Add New icon (
![]() ) on the header bar
) on the header bar - To reorder Event listings, click the applicable Arrow button
![]()
- To edit an Event listing, click the ‘pencil’ button
![]()
- To delete an Event, click the ‘pencil’ button
![]() to edit it and then Delete it from the Event Details screen
to edit it and then Delete it from the Event Details screen
 ) on the header bar

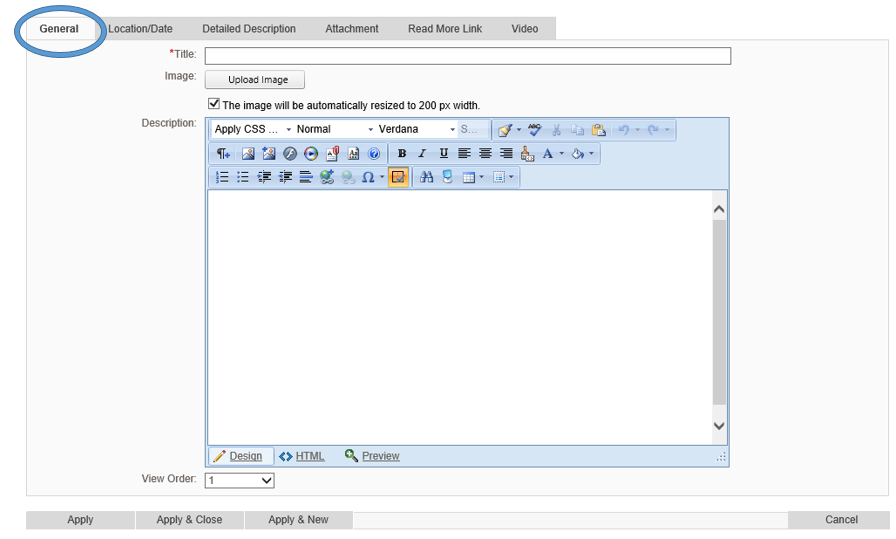
When editing or adding an Event listing, the Event Details screen will be displayed. Fill in the appropriate fields and press [Apply] to store your changes.
GENERAL
Under General tab, enter the title of the event and a brief description of the event. You may also attach an image here as well as change the view order of the events from here.
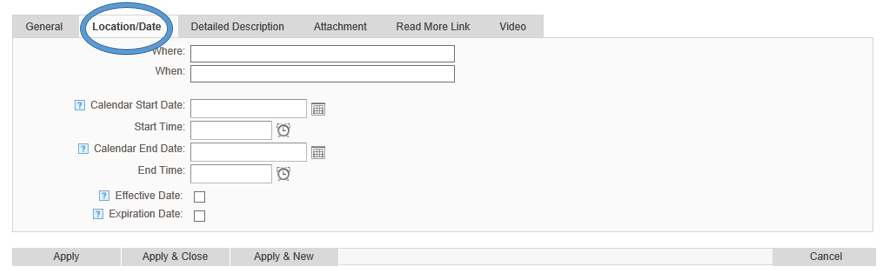
Location/Date
Under Location/Date, you can enter where and when the event is including the time it starts and ends. The When text box is where you will put the date and time of the event. It does not have to be in any particular format. The Calendar Start and End Date is used if the Event component feeds a Calendar. It is the date that will be highlighted in the Calendar.
You can also set up and effective and expiration date to the event.
Under Location you have the option to Automatically delete an event upon expiration by checking the Automatically delete event upon expiration check box.
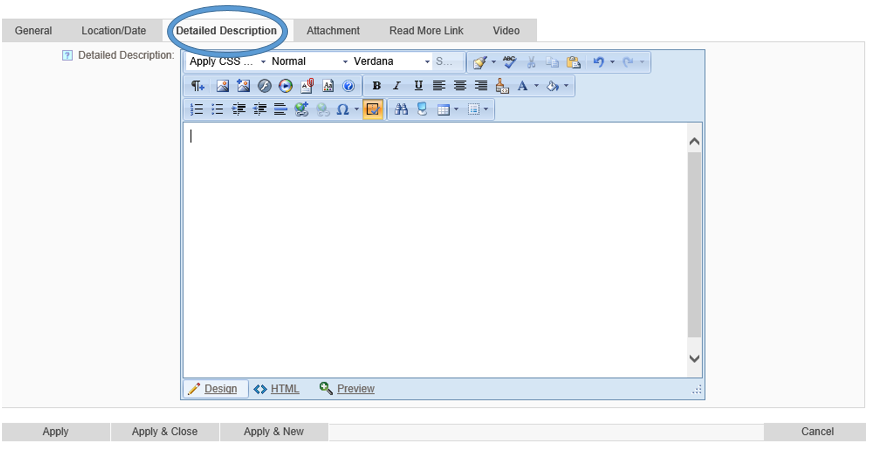
Detailed Description
Under Detailed Description you can include additional details to the Event. This full description will display when a user clicks on the title of the event.
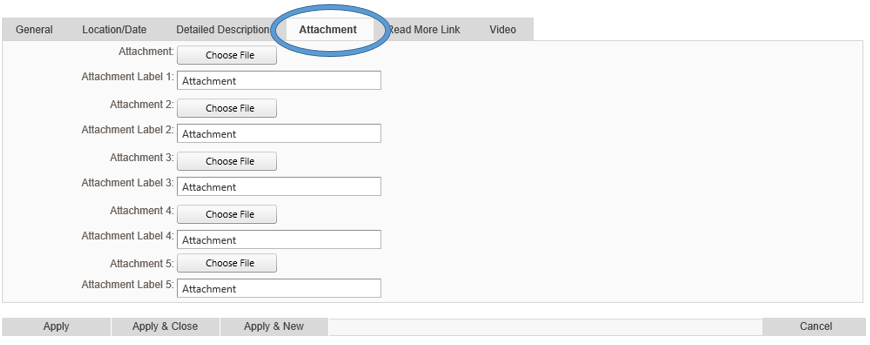
Attachment
Under attachment you can add up to five files to go along with your event. These attachments can also be removed or modified at any time.
Read More Link
Under Read More Link you can put a link to a website that is related to your event. That link can also be set up to open in a new window if you select Open Link in New Window checkbox.

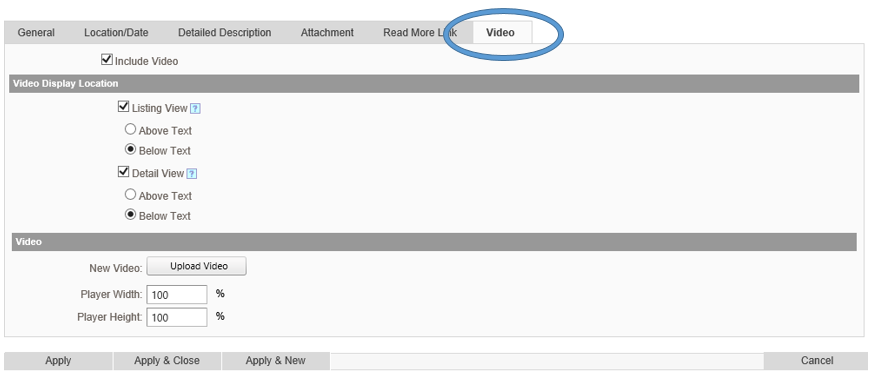
Video
If you want to display a video with your event, click on the Video tab and select Include Video checkbox. After clicked, options will appear below it.
- Video Display Locations
- Listing View – Will display in the main listing with other events on the page
- Above Text
- Below Text
- Detailed View – Will only display the video when someone clicks on the event for the Detailed description.
- Above Text
- Below Text
- Listing View – Will display in the main listing with other events on the page
- Video – Click on Upload Video to find the video you want to display. This player is designed to play .MP4, .OGV, .WEBM files / extensions by default. If you choose to upload/configure any other file formats within the Media Player component the file you upload will be converted to .MP4 format upon saving this screen. The conversion utility supports almost all known video and audio formats based on the capabilities FFMpeg tool used to do the conversion. To learn more about the FFMpeg tool search for FFMpeg on the internet.
- Player Width
- Player Height
Post your comment on this topic.